![]()
![]()
![]()
![]()
![]()
![]()
![]()
![]()
![]()
|
|
|
| concept • components • advantage • methods • loading • discharge • categories • what makes a tank special? • glossary |
| Pumped Discharge | ||||||||
1.
Refer to section ‘Before Discharge’ Click here to view 'Before Discharge' 2. Top outlet discharge: Remove top outlet blank flange, bolt hose couplings to top outlet flange. 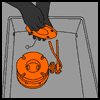
Bottom outlet discharge: remove bottom outlet blanking cap or flange, connect hose ensuring that hose connection is correct and tight. 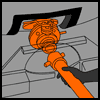
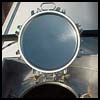
3. Open manlid or airline connection to vent tank. 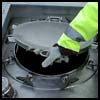
4. Open tank outlet valve or valves and commence discharge. Check constantly for leaks in hoses or connections. 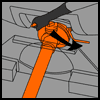
5. Drain tank. |
6.
When discharge is complete, Top outlet discharge: Drain hose, close top outlet valve and remove hose from tank. Replace top outlet blank flange. Tanks with single bottom outlet valve - Close valve and then drain hose. - Disconnect hose and replace blanking flap or flange. Tanks with foot valve and external valve: - Close foot valve. - Drain hose. - Close external valve. - Disconnect hose and replace blanking cap or flange. (This sequence is important to ensure that no product remains between foot valve and external valve). 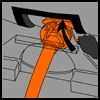
7. Close manlid and tighten down, or close airline connection, replacing blanking cap. 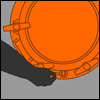
8. Refer to selection ‘After discharge’ Click here to view 'After Discharge' |
|||||||
| Gravity Discharge | ||||||||
1. Refer to section
‘Before discharge’. |
Tanks with foot
valve and external valve Close foot valve. Drain hose. Close external valve Disconnect hose and replace blanking cap or flange. (This sequence is to ensure that no product remains between foot valve and external valve).
7. Close manlid and tight en down or close airline connection and replace blanking cap.
8. Refer to section ‘After discharge’. Click here to view 'After Discharge' |
|||||||
| Pressure Discharge | ||||||||
| 1 Refer to section 'before
Discharge' Click here to view 'Before Discharge' 2. Top outlet discharge remove top outlet blank flange, bolt hose couplings to top outlet flange and open top outlet valve. NOTE: The syphon tube extends to approximately 12mm from tank bottom at outlet end of tank, so that the minimum of cargo remains after discharge via top outlet. Bottom outlet discharge: connect hose to bottom outlet assembly Remove bottom outlet cap or flange, connect hose, ensuring that hose connection is correct and tight, open foot valve (if fitted) and open outlet valve. 3. Connect airline and open airline valve (if fitted) 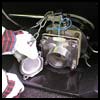  4. Open tank outlet vlave or valves and commence discharge. Check constantly for leaks in hoses or connection. 
|
5.
Apply pressure until discharge is completed, (not exceeding tank and hose
working pressure). Check constantly for leaks in hoses and connections.
Pressure will drop when discharge is complete. 6. When discharge is complete, and hose line is empty, close airline valve, disconnect airline and replace blanking cap. NOTE: It is important to relieve any remaining pressure in the tank through the hose when noxious and hazardous vapours are present.  7 Bottom outlet discharge: Tanks with single bottom outlet valve. Close valve and drain hose. Disconnect line and replace blanking cap or flange. 
Tanks with foot valve and external valve: Close foot valve: Drain hose. Close external valve. Disconnect hose and replace blanking cap or flange. |
|||||||
Printing |
||||||||